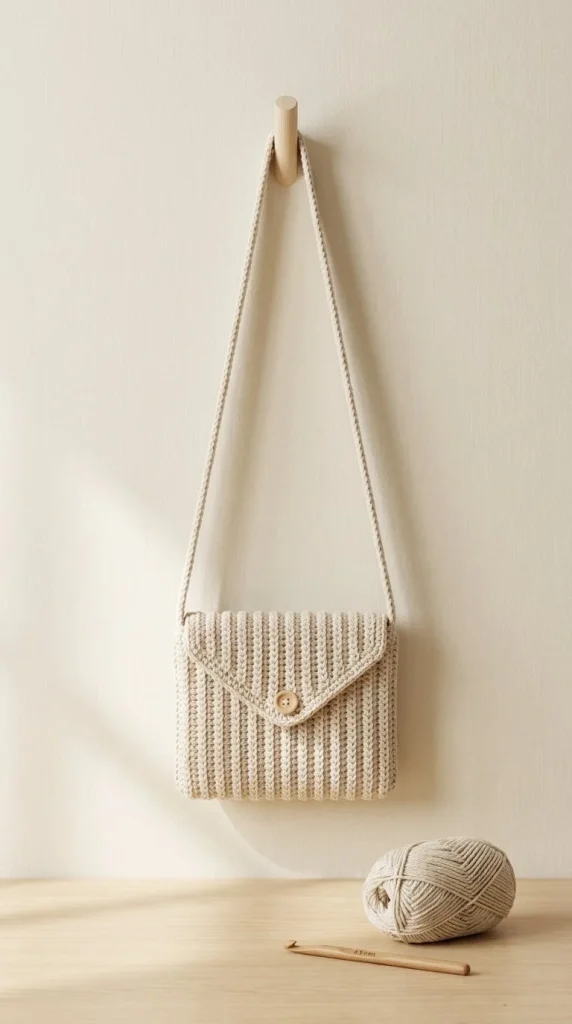
Create a stylish and functional accessory with this ribbed crossbody bag pattern. Perfect for keeping your essentials close at hand while adding a touch of handmade charm to any outfit, this bag features a simple ribbing technique and is an excellent project for crochet enthusiasts looking to improve their skills. Let’s dive into the details and create your very own crossbody bag!
Skill Level
Confident Beginner
This pattern is ideal for someone with basic crochet skills, particularly familiarity with half double crochet and single crochet stitches. If you’re comfortable following written instructions and are ready to tackle a fun project, this bag is for you!
Materials
- 320 m aran-weight cotton blend yarn
- 4.5 mm crochet hook
- Magnetic snap or 22 mm wooden button
- Yarn needle
- Stitch markers
- Scissors
Abbreviations — US Terms
- ch – chain
- sc – single crochet
- hdc – half double crochet
- BLO – back loop only
- st(s) – stitch(es)
Special Stitches
hdc (Half Double Crochet)
- Yarn over and insert your hook into the stitch.
- Yarn over again and pull through, so you have three loops on your hook.
- Yarn over once more and pull through all three loops on the hook.
sc (Single Crochet)
- Insert your hook into the stitch.
- Yarn over and pull through, so you have two loops on your hook.
- Yarn over again and pull through both loops on the hook.
Gauge
Gauge is not essential for this project, but maintaining consistent tension will ensure that your bag is even and well-structured.
Finished Size
The finished size of the bag is approximately 23 cm x 18 cm.
Pattern Notes
- The project is worked in rows.
- The foundation chain is worked in multiples of the specified initial chain.
- Each row begins with a turning chain of 1 stitch.
- The bag consists of a front panel, back panel with a flap, a gusset, and a strap.
- When joining the gusset, work through both layers of the fabric.
Crochet Instructions
Part 1 – Front Panel
Row 1
- Begin: Chain 38.
- Work: Starting from the 2nd chain from the hook, work 1 hdc in each chain across. This totals 37 hdc.
- End: Chain 1 and turn.
Rows 2–24
- Work: 1 hdc in the back loop only (BLO) across each row.
- Repeat: For a total of 23 more rows. After Row 24, fasten off.
Part 2 – Back Panel and Flap
Rows 1–24
- Repeat: Work the same as for the Front Panel. Fasten off after Row 24.
Rows 25–31 (Flap)
- Work: Continuing from the flap, for Rows 25 to 31, work 1 hdc BLO across.
- End: For each row, chain 1 and turn.
Row 32
- Work: hdc2tog (half double crochet two together), then work to the last 2 sts, hdc2tog again.
- End: Chain 1 and turn.
Rows 33–37
- Repeat: Row 32.
- End: After Row 37, fasten off.
Part 3 – Gusset
Row 1
- Begin: Chain 9.
- Work: From the 2nd ch from the hook, work 1 sc in each chain across (8 sc).
- End: Chain 1 and turn.
Continue
- Work: Continue working sc in each row until the strip measures 59 cm.
Part 4 – Assembling the Gusset
- Pin: The gusset around the two sides and bottom of the front panel.
- Join: With evenly spaced sc through both layers to secure the gusset to the front panel.
Part 5 – Attaching the Back Panel
- Repeat: Attach the remaining edge of the gusset to the back panel, making sure to leave the flap free.
Part 6 – Closure
- Option 1: Sew the magnetic snap inside, ensuring it aligns with the flap for easy closure.
- Option 2: Create a ch-8 loop at the flap point and sew the chosen button to the front for a unique detail.
Part 7 – Strap
Row 1
- Begin: Chain 176.
- Work: Starting from the 2nd ch from the hook, work 1 sc across the chain.
- End: Chain 1 and turn.
Rows 2–4
- Work: 1 sc BLO across for each row.
- The finished strap should measure approximately 110 cm.
Part 8 – Attaching the Strap
- Sew: Each strap end to the gusset with a reinforced square of stitches to ensure strength.
- Final Steps: Weave in all loose ends and block the bag to the finished size measurements of 23 cm x 18 cm.
How to Resize
To resize, simply adjust the foundation chain for the front and back panels while maintaining the same stitch counts and row repetitions for consistency. Ensure you check the gusset length to keep the proportions correct.
Color Variations
Feel free to experiment with colors! A bright or variegated yarn can add a playful twist to your crossbody bag, while neutral tones will create a more classic look.
Yarn and Hook Tips
For this project, using a cotton blend yarn will provide both structure and durability, perfect for a sturdy bag. A 4.5 mm hook will create an ideal tension to showcase the bag’s ribbed design.
Tips for the Best Result
- Marking Rows: Use stitch markers to keep track of the rows when working the flap and gusset sections to avoid confusion.
- Tension: Maintain even tension throughout to ensure that your bag keeps its shape and strength.
- Seam Alignment: Pay close attention when joining parts together to keep seams aligned perfectly.
Common Mistakes
Uneven Gusset Joining
If the gusset does not align neatly with the panels, recheck your stitch counts and ensure even spacing when attaching.
Not Fastening Off Properly
Forgetting to fasten off can lead to unraveling seams. Make sure to secure your ends well to maintain the bag’s integrity.
Finishing
Once all the parts are assembled and secured, take the time to carefully weave in any remaining ends, ensuring a clean finish. If desired, block your finished piece to enhance the shape and help the ribbing stand out.
Care
For maintaining your cotton blend bag, hand wash it gently and lay it flat to dry. Always check your yarn label for specific care instructions.
Conclusion
With its simple yet stylish design, the crossbody bag is a perfect project for showing off your crochet skills while being functional. Happy crocheting!



