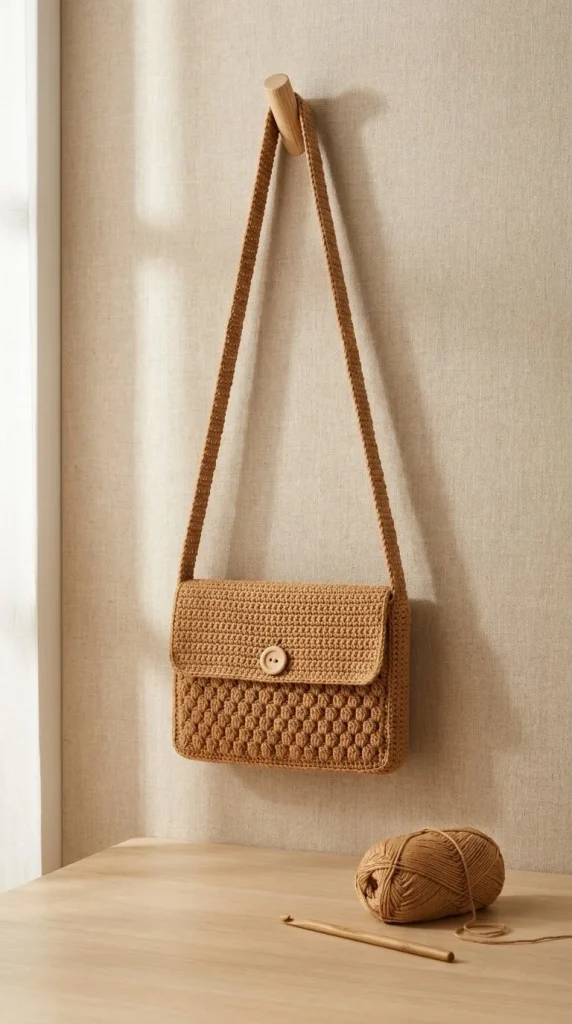
Creating a stylish and functional crossbody bag is a wonderful way to level up your crochet skills. The Honeycomb Texture Crossbody Bag features a lovely texture and is perfect for outings where you need just enough space for your essentials. With a simple construction and charming details, this pattern is suitable for those ready to tackle their next crochet project.
Skill Level
Confident Beginner
This project is ideal for crocheters who are comfortable with basic stitches and ready to explore simple rounds and shaping techniques. The textured stitch work and construction techniques will help enhance your skills while creating a functional accessory.
Materials
- 350 m worsted-weight cotton yarn (camel)
- 4.0 mm crochet hook
- 25 mm wooden button
- Yarn needle
- Stitch markers
- Scissors
Abbreviations — US Terms
- ch – chain
- sl st – slip stitch
- sc – single crochet
- hdc – half double crochet
- st(s) – stitch(es)
Special Stitches
Half Double Crochet (hdc)
To work a half double crochet stitch, yarn over, insert the hook into the indicated stitch, yarn over again, pull up a loop (3 loops on hook), yarn over, and pull through all 3 loops on the hook.
Gauge
Gauge is not critical for this project, but maintaining consistent tension will ensure an even texture across the bag.
Finished Size
The finished bag dimensions are approximately 19 cm high and 35 cm wide. Adjustments can be made to the body height if a different size is desired.
Pattern Notes
- The bag is worked in rounds, and the base is formed first before building up the body.
- The body incorporates a textured stitch pattern, alternating between single and half double crochet.
- The flap is worked over a marked section at the back and includes decreases for a snug fit.
- Joining is done with slip stitches, and a button loop is created for closure.
- The strap adds an extra touch of style and functionality.
Crochet Instructions
Part 1 – Base
Foundation Chain
- Ch 35: This will form the starting foundation for your bag.
Row 1
- Row 1: In the 2nd ch from the hook, work 1 sc. Continue to sc across to the end of the chain. You should have 34 sc.
Total: 34 sc - Ch 1, turn.
Rows 2–10
- Rows 2–10: Work 1 sc in each st across. After finishing Row 10, you will have a base approximately 6 cm high.
Total: 34 sc - Ch 1, turn each row.
Part 2 – Body
- Join at the end of Row 10: Work evenly around the base by placing 34 sc along each long edge and 10 sc along each short edge.
Body Rounds
- Join with sl st to complete the round. You will have 88 sts in total.
Round 1
- Round 1: Ch 1, work 1 sc in each st around. Join with a sl st.
Total: 88 sc
Round 2
- Round 2: Ch 1, work 1 sc in each st around. Join with sl st.
Total: 88 sc
Round 3
- Round 3: Ch 1, work 1 sc in each st around. Join with sl st.
Total: 88 sc
Round 4
- Round 4: *Work 1 sc in the next st, 1 hdc in the next st; repeat from * around. Join with sl st.
Total: 88 sts
Round 5
- Round 5: *Work 1 hdc in the next st, 1 sc in the next st; repeat from * around. Join with sl st.
Total: 88 sts
Repeat Rounds 4–5
- Repeat Rounds 4–5 for a total of 10 times. Continue until the body measures approximately 19 cm high.
Part 3 – Back Flap
- Mark the center 34 sts of the last round worked on the back. You will only work over these 34 sts.
Rows 1–8
-
Row 1: Work 1 sc in each of the 34 marked sts across.
Total: 34 sc -
Ch 1, turn.
-
Rows 2–8: Repeat Row 1. Each row consists of 34 sc across, forming the flap.
Rows 9–13 (Decreasing)
-
Row 9: Work 1 sc in the first st, work 1 sc in the next 32 sts, and then work 1 sc in the last st (decrease at both ends).
Total: 32 sc -
Ch 1, turn.
-
Row 10: Repeat decrease as in Row 9.
Total: 30 sc -
Row 11: Repeat decrease as in Row 9.
Total: 28 sc -
Row 12: Repeat decrease as in Row 9.
Total: 26 sc -
Row 13: Repeat decrease as in Row 9.
Total: 24 sc -
Fasten off.
Part 4 – Button Loop
-
Join yarn at the center of the flap.
-
Ch 10.
-
Work a sl st into the same point to create a loop.
-
Fasten securely and secure the end of the yarn.
-
Finalize by sewing the wooden button to the front of the flap for closure.
Part 5 – Strap
- Ch 181: This will form the strap for the bag.
- In the 2nd ch from the hook, work 1 hdc. Continue to work hdc across the chain. You will work 2 additional rows of hdc to ensure the strap has adequate thickness.
Hdc Rows
-
Row 1: Work 1 hdc in each st across the strap.
Total: 180 hdc -
Row 2: Work 1 hdc in each st across.
Total: 180 hdc
Attaching Strap
- Sew the strap ends firmly to the side seams of the bag, ensuring they are secure.
Finishing Touches
- Weave in all ends using a yarn needle. Be cautious around the texture to maintain its shape.
- Lightly steam-block the bag without pressing the texture flat to ensure the final shape is correct.
Tips for the Best Result
- Use stitch markers to keep track of your rounds and rows, especially when working the body and flap.
- For uniformity, ensure your tension remains consistent throughout the project.
- Be cautious while working the decreases on the flap to ensure both sides decrease evenly.
Common Mistakes
Uneven Flap Size
Ensure you are consistently counting the stitches on each row to avoid unevenness.
Incorrect Strap Length
Confirm you are starting with the correct chain count. Adjust as needed for preferred strap length.
Care
This cotton bag should be hand washed in cold water and laid flat to dry to maintain its shape and texture.
Conclusion
The Honeycomb Texture Crossbody Bag is not just a stylish accessory but also a great chance to improve your crochet skills. By following this pattern step by step, you’ll create a functional and beautiful bag that showcases your crochet artistry. Enjoy your crafting!



