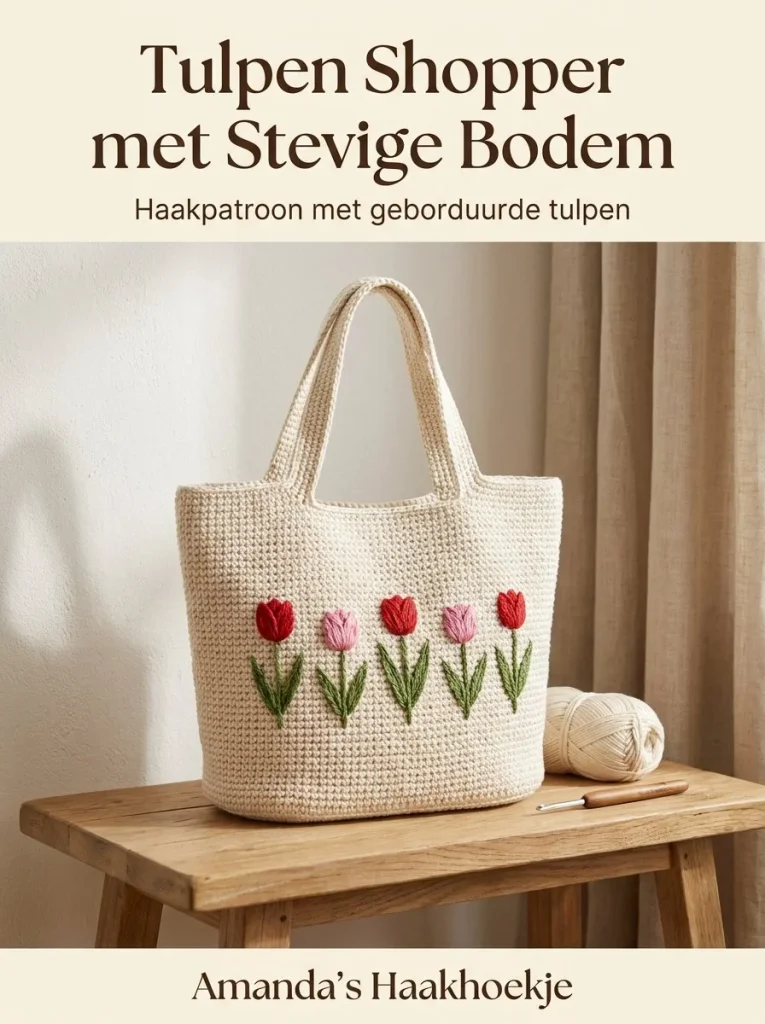
Create your own delightful crochet shopper bag with a sturdy bottom, inspired by tulips in spring! This project combines functionality with the beauty of floral designs, making it an excellent accessory for everyday use or a gift for a loved one. Following this detailed crochet pattern will help you create a lovely bag that showcases your crochet skills and love for vibrant colors.
Skill Level
Confident Beginner. This project requires basic crochet knowledge, including how to make chains, single crochet, and slip stitches. A bit of experience with working in rounds and color changes will be beneficial.
Materials
- 300 g medium-weight cotton yarn in cream
- Scraps of red, pink, and green yarn for the tulips
- Crochet hook, 4 mm
- Yarn needle
- Scissors
- Optional: Sturdy lining for the base
Abbreviations — US Terms
- ch – chain
- sl st – slip stitch
- sc – single crochet
- st(s) – stitch(es)
Special Stitches
No special stitches are used in this pattern, but ensure you are comfortable with the basic stitches mentioned in the abbreviations.
Gauge
Gauge is not essential for this project, but consistent tension will ensure a well-formed bag.
Finished Size
The finished bag will measure approximately 32 cm (12.5 inches) in height.
Pattern Notes
- The bag is constructed in the round, starting from the base and working up to the top.
- You will be making increases on the base to create a sturdy oval shape before continuing straight up for the body of the bag.
- It is important to keep your tension consistent for a polished look.
- As you work on the tulip designs, feel free to arrange them as you prefer to create a unique design.
Crochet Instructions
Part 1 – Base
Round 1
- Begin by chaining 46.
- Starting in the second chain from the hook, work 1 sc in each chain across (total of 45 sc).
- Continue working up the other side of the foundation chain, making 45 additional sc, resulting in a total of 90 stitches.
Total: 90 sc
Round 2 to Round 9
- For each round, work in the round without joining for a seamless finish. Begin each round with 1 sc in the first stitch.
- Increase evenly at both ends of the work.
- Example: In Round 2, make the first sc, add 1 increase (2 sc in the same stitch), then continue to the end of the round, repeating the increase where needed for the right amount of stitches.
- Work a total of 8 rounds of sc, making sure the base is firm and oval-shaped.
Total: Starts at 90 sc in Round 1; increases gradually to make a sturdy base.
Part 2 – Bag Body
Rounds 10 and onward
- Without making any increases, continue to work in sc until the bag measures approximately 32 cm (12.5 inches) in height.
- Be mindful of your tension to ensure the sides remain straight and upright.
Total: 90 sc per round.
Part 3 – Tulip Design
- On the front of the bag, place five simple tulips using red and pink yarn.
- Each tulip can consist of simple shapes such as a series of single crochets forming petals.
- Use green yarn to embroider stems and leaves, creatively spreading them throughout the tulips.
Part 4 – Handles
Handle 1
- Begin by chaining 70.
- Skip the first 18 stitches, then slip stitch to attach the remaining chain to the body of the bag.
- Repeat on the opposite side to complete the handle.
Handles Rounds
- Work 3 rounds of sc around each handle and the upper edge of the bag to create a finished look and reinforce the handles.
Part 5 – Finishing
- Weave in all loose ends securely to finish your bag.
- If you opted for a lining, sew it into the inside of the bag.
- Gently stretch the bag into shape and block if necessary to help it hold its form.
Care
To maintain your crochet bag, hand wash in cold water and lay flat to dry. Check your yarn label for specific care instructions to keep the colors vibrant.
Conclusion
You’ve successfully created a lovely tulip shopper bag with a sturdy base! This project not only serves a practical purpose but also adds a colorful, handmade touch to your life. Enjoy the fruit of your labor, and don’t hesitate to experiment with different colors or motifs as you continue to grow your crochet skills. Happy crocheting!



