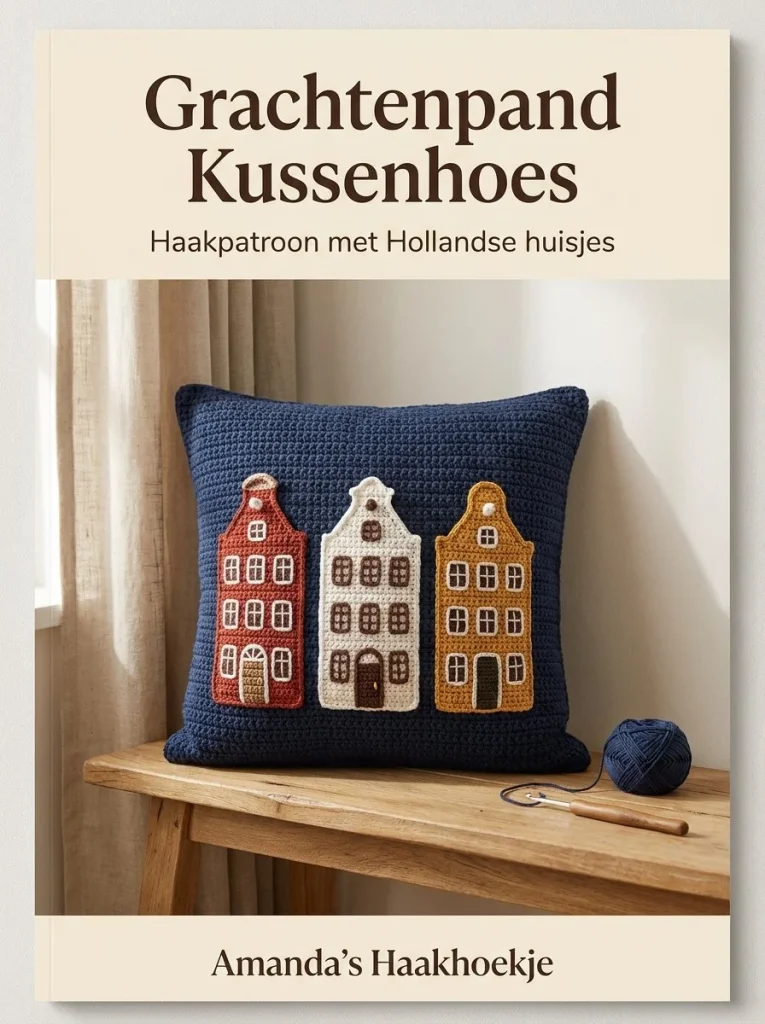
Create a cozy and charming crocheted cushion cover that brings a touch of Dutch architecture into your home. The Grachtenpand Kussenhoes is a delightful project that combines basic crochet techniques with colorwork and motifs to provide both aesthetic appeal and comfort. This pattern is perfect for those who enjoy exploring crochet while creating functional decor.
Skill Level
Confident Beginner
This project requires basic crochet skills such as chaining, double crochet, and color changes. Working with motifs and joining techniques will enhance your skills, making it an excellent project for those ready to branch out into more complex designs.
Materials
- 250 g medium-weight cotton in dark blue
- Scraps of white, brick red, and mustard yellow
- 4 mm crochet hook
- 45 × 45 cm cushion insert
- Four buttons
- Yarn needle
- Scissors
Abbreviations — US Terms
- ch – chain
- dc – double crochet
- st(s) – stitch(es)
- sl st – slip stitch
- hdc – half double crochet
- sp – space
Special Stitches
None needed for this project as it primarily consists of basic stitches.
Gauge
Gauge is not critical for this project, but maintaining consistent tension will ensure a well-fitting cushion cover.
Finished Size
The final cushion cover will fit a 45 × 45 cm cushion.
Pattern Notes
- The project is worked in rows.
- It features color changes for the motifs.
- Turning chains do not count as stitches.
- The cushion cover is made of two identical panels that are sewn together with a button closure on one side.
- When joining, ensure the wrong sides of the fabric face each other.
Crochet Instructions
Part 1 – Main Panels
Row 1
- Chain 76.
- Starting in the second chain from the hook, work 75 double crochets (dc).
- Turn work. Total: 75 dc.
Row 2 onward
- Chain 2 (this counts as your first dc for the new row).
- Continue working 75 dc across until the panel measures 45 cm in height.
- Repeat this process to create two identical panels.
Part 2 – Front Motifs
First Motif
-
Using brick red yarn, chain 13.
-
Starting in the fourth chain from the hook, work 1 dc,
-
Then, in each of the following 9 chains, work 1 dc.
-
Chain 1, and in the same chain as the last dc, work 1 dc. This creates a peak.
-
For the next rows, switch colors to white and mustard yellow as desired. You can choose any color scheme that reflects a traditional row of canal houses.
Repeat this pattern to create three motifs.
Part 3 – Embroidering Details
Using white yarn:
- With a yarn needle, embroider small windows and doors onto each of the motifs.
- Position each motif into each panel as desired.
Part 4 – Assembly
- Once both panels are completed, place them together with the wrong sides facing each other.
- Use a slip stitch to join three sides of the panels together, leaving one side open for the cushion insert.
- On the open side, work four button loops by chaining 6 and slip stitching into the base of the chain. Attach the yarn, making four loops evenly spaced from the top.
Adding Buttons
- Sew buttons on the corresponding panel, ensuring they align with the button loops.
Part 5 – Inserting the Cushion
- Insert the cushion insert into the pillowcase.
- Gently fold the open side over and secure the buttons to close the cushion cover.
Part 6 – Finishing
- Weave in any loose ends using a yarn needle.
- Ensure all seams are secure and tidy for a polished finish.
How to Resize
To resize, adjust the foundation chain in multiples of 2 for width. Ensure the height matches by checking the number of rows.
Color Variations
Consider using shades of teal and yellow for a fresh look, or pastels for a soft, spring effect.
Yarn and Hook Tips
Choosing a smooth, consistent yarn will help maintain an even stitch tension, particularly important for the neat edges of the cushion cover.
Tips for the Best Result
- Use a stitch marker to keep track of your rows.
- Keep your tension consistent while changing colors to avoid puckering.
- Check your corners to ensure they are well-formed and even.
Common Mistakes
Misaligned Motifs
Ensure that you consistently place your motifs in the same order throughout each panel for symmetry.
Button and Loop Size
Make your button loops slightly larger than your buttons to allow for easier closure.
Project Ideas or Variations
This pattern can be adapted into a larger decorative pillow, or combined with other motifs to create a throw blanket.
Care
As the project uses cotton yarn, it is recommended to hand wash in cold water and lay flat to dry for best results.
Conclusion
Creating this crochet cushion cover not only offers a beautiful home decor item but also builds your crochet skills in working with color and structure. Enjoy displaying your handcrafted piece while adding a cozy atmosphere to any space!



