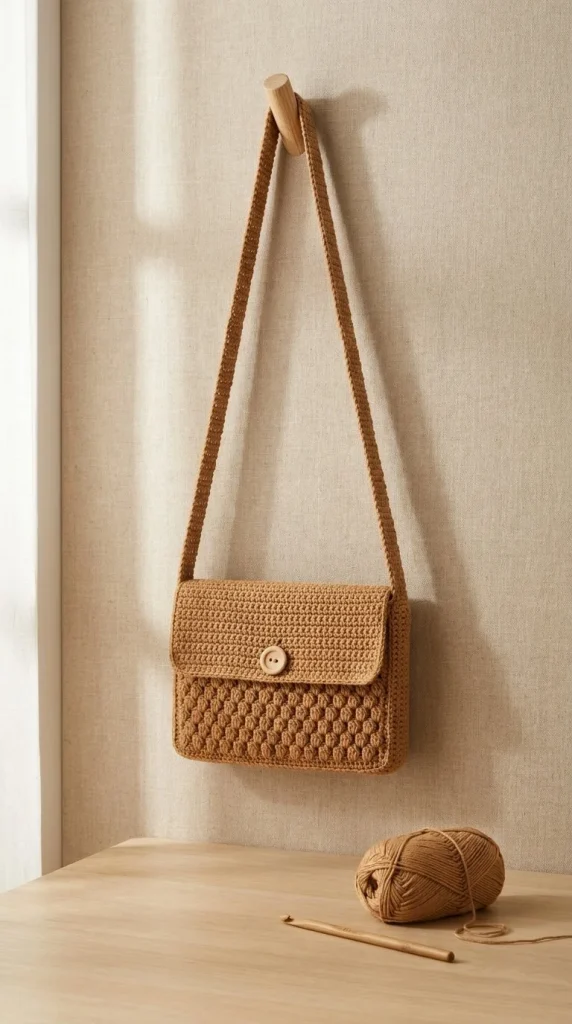
Create a stylish and practical accessory with this detailed crochet pattern for a crossbody bag featuring a lovely honeycomb texture. This bag is ideal for everyday use while showcasing your crochet skills with its unique stitch work. Follow the instructions below and create a chic piece that is both functional and fashionable.
Skill Level
Confident Beginner. This project is suitable for crocheters who are comfortable with basic stitches and are eager to try out a few new techniques.
Materials
- 350 m worsted-weight cotton yarn (camel)
- 4.0 mm crochet hook
- 25 mm wooden button
- Yarn needle
- Stitch markers
- Scissors
Abbreviations — US Terms
- ch – chain
- sl st – slip stitch
- sc – single crochet
- hdc – half double crochet
- st(s) – stitch(es)
Special Stitches
There are no unique stitches for this pattern aside from the basic stitches noted above.
Gauge
Gauge is not critical for this project; however, maintaining consistent tension will ensure the bag holds its shape.
Finished Size
The finished dimensions of the bag are approximately 19 cm in height and width determined by the base. The strap should be approximately 105–115 cm long.
Pattern Notes
- The project is worked in rounds and rows.
- The base forms a rectangle.
- The body is worked in rounds around the base.
- The back flap is worked in rows across the center back.
- A button loop is created at the flap center for closure.
- The strap is worked separately and sewn onto the bag.
- It’s recommended to use stitch markers to keep track of your rounds.
Crochet Instructions
Part 1 – Base
Row 1
Begin by chaining 35. In the second chain from the hook, work 1 sc. Continue to work 1 sc in each chain across. You should have 34 sc total. Chain 1 and turn.
Rows 2–10
For each row from 2 to 10, work 1 sc in each stitch across. At the end of each row, chain 1 and turn. After completing 10 rows, the base will measure approximately 6 cm high.
Part 2 – Body
Round 1
Once the base is complete, work evenly around the perimeter of the base. You will place 34 sc along each long edge and 10 sc along each short edge, totaling 88 stitches. Join with a sl st to the first sc to form a circle.
Round 2
At the start of Round 2, chain 1. Work 1 sc in each stitch around. Join with a sl st to the first stitch. The total stitch count remains 88.
Round 3
Repeat the same process as in Round 2. Chain 1, sc in each stitch around, and join. You will still have a total of 88 stitches.
Round 4
Begin Round 4 with a chain 1. Work the following stitch sequence: 1 sc in the next st, 1 hdc in the next st. Repeat from * to * around the entire round. Join with a sl st at the end. Total stitch count remains 88.
Round 5
Start Round 5 with a chain 1. Repeat the following sequence: 1 hdc in the next st, 1 sc in the next st. Repeat from * to * until the end of the round, and join with a sl st. The stitch count will remain 88.
Rounds 6–15
Continue to alternate between Rounds 4 and 5 for a total of 10 more rounds, or until the body reaches a height of 19 cm.
Part 3 – Back Flap
Marking and Rows
Mark the center 34 stitches on the back of the bag. You will now work over these marked stitches only.
Row 1
Start with a chain 1 and work 1 sc in each of the 34 marked stitches across. At the end of the row, chain 1 and turn.
Rows 2–8
For Rows 2 through 8, repeat the process: chain 1 and sc across the 34 stitches. After Row 8, the flap will be complete at its initial height.
Rows 9–13
To shape the flap, you will decrease at both ends of each row. For Rows 9 to 13, work as follows:
- Row 9: Chain 1, sc in the first stitch, then make a decrease by working 2 sc together, sc in each of the next 30 stitches, decrease by working the last 2 sts together, and join.
- Rows 10–13: Repeat the process as described in Row 9 for each additional row. After completing Row 13, fasten off.
Part 4 – Button Loop
Creating the Loop
At the center of the flap, join your yarn again and chain 10. Then, slip stitch into the same point where your yarn was joined to create a loop. Fasten securely.
Attaching the Button
Sew the wooden button to the front of the flap where the loop will secure.
Part 5 – Strap
Making the Strap
Chain 181. In the second chain from the hook, hdc across. You will have 180 hdc total.
Additional Rows
Work 2 more rows of hdc in the same manner, which should give you a sturdy strap. Aim for a total strap length of 105–115 cm.
Part 6 – Assembly
Attaching the Strap
Carefully sew both ends of the strap to the side seams of the bag, ensuring that they are securely attached.
Finishing Touches
Weave in all ends securely. For a neat finish, lightly steam-block the bag without flattening the texture you’ve created.
Care
For the cotton yarn used, spot clean as needed or hand wash gently. Refer to the yarn label for specific care instructions.
Conclusion
This Honeycomb Texture Crossbody Bag is not only functional but also a delightful project that allows you to showcase your crochet talents. Enjoy using your handmade item, and consider giving variations as gifts to friends and family! Happy crocheting!



