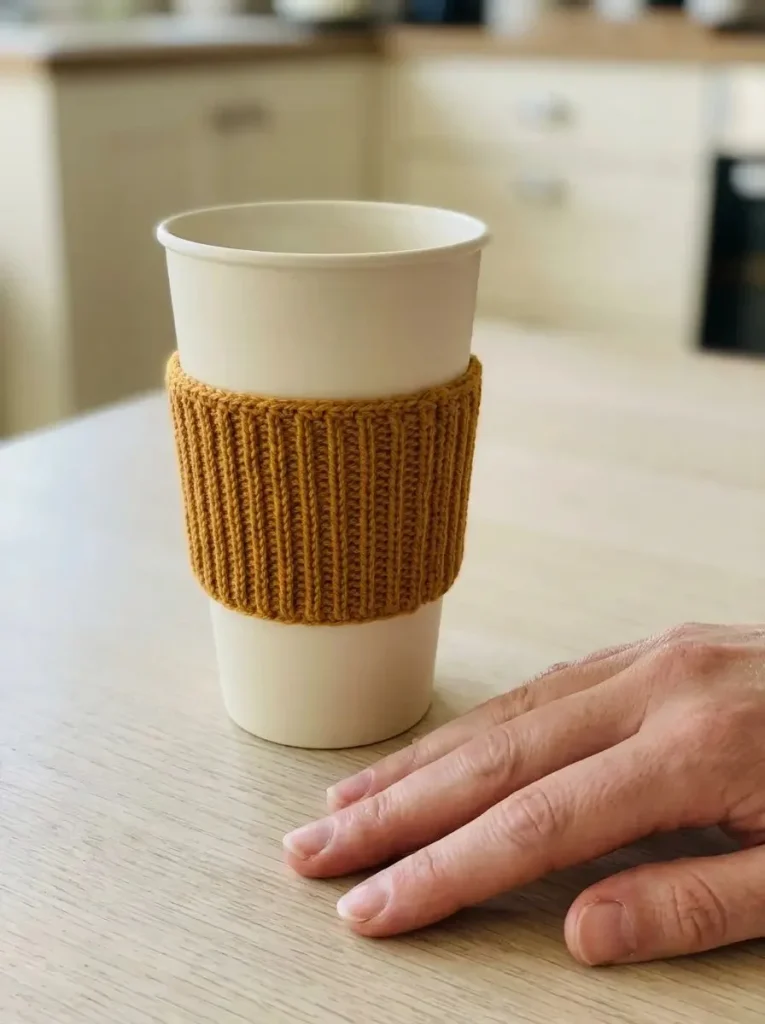
This crochet project is a functional and stylish Ribbed Reusable Cup Sleeve, designed to elevate your coffee-drinking experience while simultaneously helping reduce waste. As we move towards more sustainable practices, having a personal cup sleeve makes it easy to stay environmentally conscious. This cup sleeve not only adds a personal touch to your daily coffee or tea routine but also provides effortless grip and insulation for your beverages.
Constructed using simple crochet techniques, this sleeve is perfect for beginners eager to practice their skills while creating something practical. It features a ribbed texture, allowing it to provide a snug fit on your favorite reusable takeaway-style cup. As you work through the pattern, you will discover the joy of seeing your yarn transform into a functional accessory that can make your daily life a little more enjoyable.
Pattern at a Glance
- Skill Level: Beginner
- Terminology: U.S. terms
- Construction: Worked in rows to form a band that wraps around the cup
- Finished Size: Approximately 6–7 cm in height; circumference adjusted to the cup
- Yarn Weight: Medium-weight cotton
- Hook Size: Approximately 4 mm
- Main Stitch: Single crochet (sc), back loop only (BLO)
- Gauge: Not specified, but adapting to fit your cup is essential
- Motifs: None
- Layout: Straight band
- Joining: Sewn together to create a sleeve
- Finishing: Weave in ends and wash as per yarn label
Materials
To make your Ribbed Reusable Cup Sleeve, gather the following materials:
- Yarn: Approximately 25–40g of medium-weight cotton yarn (color: warm ochre)
- Crochet Hook: Approximately 4 mm
- Notions:
- Scissors
- Blunt yarn needle for weaving in ends
- Measuring tape
- One empty reusable takeaway-style cup for fitting
Each material serves an important purpose: the cotton yarn provides durability and a pleasing texture, while the crochet hook is suitable for working with this yarn weight. The measuring tape is essential for ensuring the sleeve fits snugly around your cup.
Yarn and Color Notes
Choosing the right yarn is critical for the success of this project. Medium-weight cotton yarn is an excellent choice because it offers breathability, durability, and ease of washing. Cotton will allow for a snug fit that will gently stretch yet retain its shape. The warm ochre color adds a cozy touch, making it a great accessory for fall or winter beverages.
Consider these options if you want to experiment with color combinations:
- Pair with contrasting colors for a striped effect
- Use a variegated yarn for a playful design
- Experiment with different hues to match your favorite reusable cup or your kitchen decor
Finished Measurements
The finished sleeve height should be approximately 6–7 cm, but the circumference will depend on the specific cup you choose. Ensure that your work wraps snugly, aiding in the cup’s grip without being too tight.
Gauge
While a specific gauge has not been provided, it’s essential to monitor your work. Aim for a tight but flexible stitch that allows the sleeve to cling to the cup comfortably. If your work seems too loose, consider using a smaller hook for better tension.
Abbreviations
In this pattern, the following abbreviations are used:
- ch = chain
- sc = single crochet
- BLO = back loop only
Important Pattern Notes
Before you dive into the pattern, keep these notes in mind:
- The turning chain does not count as a stitch.
- Always use BLO for this project to create the ribbed texture.
- To check your fit, frequently wrap your work around the empty cup. Adjust the number of foundation chains as necessary.
- If you encounter difficulties fitting the sleeve, remember it’s meant to fit snugly rather than loosely.
Special Stitches and Techniques
This project primarily consists of straightforward single crochet stitches worked in back loop only. This technique creates the ribbed effect that enhances the sleeve’s texture and grip. Familiarizing yourself with BLO beforehand will make for a smoother crochet experience.
Understanding the Construction
The construction involves a simple strip that is worked in rows and then joined into a ring. Here’s how it works:
- Foundation Chain: Start the project with a foundation chain that dictates the sleeve height.
- Working Rows: Continue working back and forth until the desired length, ensuring it fits the chosen cup.
- Seaming: The final step involves sewing the ends together to form the sleeve, ensuring it is positioned correctly.
Full Pattern Instructions
Foundation
- Ch 13: This foundation chain creates the initial height for your sleeve.
Row 1
- Work 1 sc in the second chain from the hook and in every remaining chain: You should have a total of 12 sc at the end of this row. The length of this foundation row determines the sleeve’s height.
Row 2
- Ch 1, turn:
- Work 1 sc BLO in every stitch: Total: 12 sc. Continue repeating this row until the sleeve height reaches approximately 6–7 cm.
Check Your Height
After completing a few rows, measure your work. Aim for a height of 6–7 cm. If you need to adjust, you can restart with more or fewer foundation chains.
Continue Adding Rows
Keep working rows until the strip fits snugly around the middle of your EMPTY cup, with the two short ends meeting with gentle stretch. It should not be loose but rather provide a comfortable grip.
Marking and Seaming
- Mark the length: Once the desired height is achieved, mark it.
- Remove work from the cup: Fasten off, leaving a sewing tail.
- Align Ends: Bring the foundation edge and final row together without twisting, sewing corresponding stitches together with a flexible seam.
Turn and Fit
- Turn the sleeve inside out so the seam sits on the inside.
- Slide the sleeve onto the empty cup from the narrower base and position it just below the drinking rim. Test if it remains securely in place when handled.
Finishing Touches
- Weave in Ends: Use the blunt yarn needle to tidy any loose ends, ensuring a clean finish.
- Final Wash and Dry: Refer to your yarn label for care instructions, as cotton may change size after washing.
Resizing
To adjust the size of your sleeve, here are a few pointers:
- If you need a larger sleeve, consider starting with a longer foundation chain.
- If it’s too large, simply work fewer rows to decrease the height and width, adapting the sleeve to fit your cup snugly.
Variations
- Experiment with different colors to match seasonal themes, or use a tonal gradient for added interest.
- Consider creating a travel cup version with a sleeve that expands to fit various cup sizes.
Troubleshooting
If you encounter any issues during your crochet journey, here are some common troubleshooting questions:
-
Why is my piece getting wider?
Miscounted stitches may lead to width discrepancies. Make sure to check each row for the correct stitch count. -
Why is my edge wavy?
Wavy edges can occur from uneven tension. Aim for consistent tension throughout your rows. -
Why does my work feel too tight?
If you’ve chosen a smaller hook size or are working too tightly, consider adjusting your grip or swatching to find a comfortable tension.
FAQs
Can I use a different yarn weight?
While medium-weight cotton is preferred for durability, you can experiment with other yarns, keeping in mind that it may alter the stitch count and fit.
Can I make it larger?
Yes, simply add more chains to your foundation or increase the number of rows.
Is the pattern reversible?
The ribbed style creates beautiful texture on both sides, although one side will have a more pronounced seam.
Do I need a special hook?
A standard crochet hook will work perfectly, just ensure it matches your yarn’s thickness.
Final Thoughts
Creating a Ribbed Reusable Cup Sleeve combines a fun crafting experience with a meaningful application. This project not only enhances your coffee-drinking rituals but also contributes positively to your environmental efforts. The straightforward construction and use of basic crochet techniques make it an excellent choice for beginners looking to expand their skills. Enjoy your new cup sleeve while embracing sustainable habits!



