By Peaulla Crochet
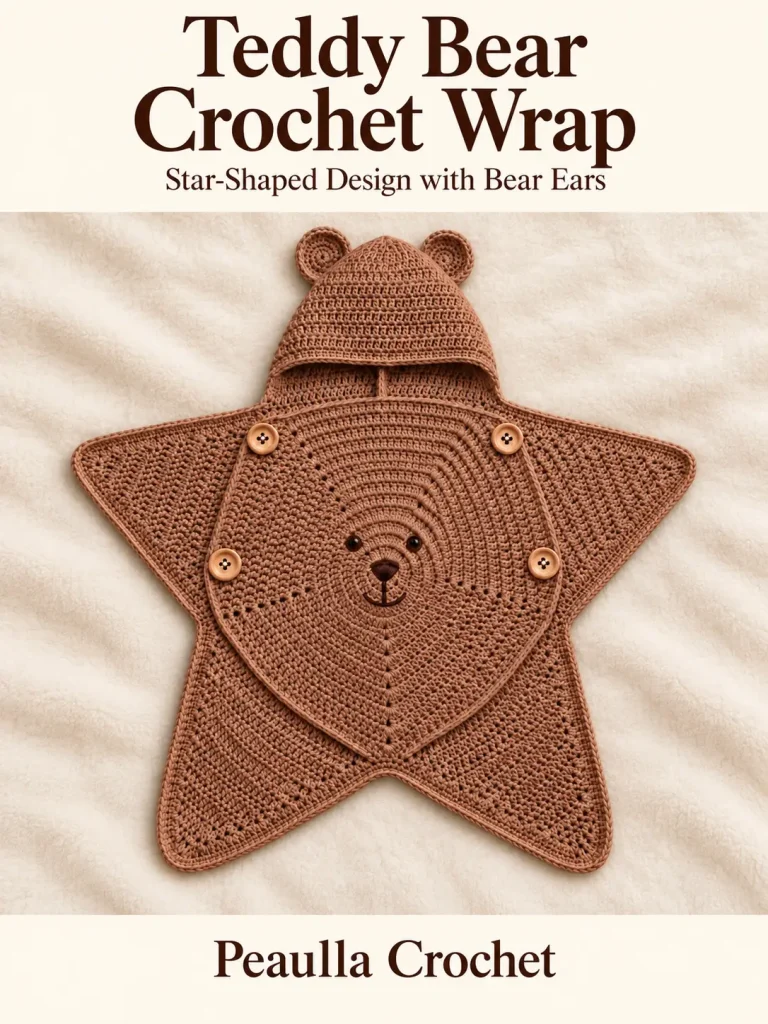
Make a brown teddy bear wrap with pointed sides, two lower points, a bear-ear hood, and a smiling front panel. This tutorial provides the actual stitches, row counts, and assembly steps for an original version inspired by the reference image.
Pattern status: Untested design draft. The construction below is newly developed; it is not a recovered or verified version of the photographed pattern. The back is rectangular beneath the overlapping front, and the points are worked separately. These choices produce a related silhouette rather than an exact duplicate. Make and measure a sample before publishing this as a tested pattern or using it on a baby. The 3–6-month label is a design target, not a guaranteed fit.
Intended Use
This is an open decorative wrap for brief, directly supervised awake use. It is not a sleep sack, swaddle, carrier, or car-seat accessory. Keep the face unobstructed, leave the arms free, and do not fasten the panels tightly. Keep the decorative hood off the baby’s head indoors. Use a doll for initial assembly and fit checks.
The American Academy of Pediatrics advises keeping loose bedding out of infant sleep spaces and avoiding indoor hats on babies. If a baby becomes sleepy, remove this piece and use an appropriate safe sleep space. AAP safe sleep guidance.
Materials
- Smooth worsted-weight yarn, category 4, in warm brown. Budget approximately 650–850 yards (595–780 m), including the swatch. This is a planning estimate; actual consumption has not been measured.
- A small amount of dark brown yarn for embroidered eyes, nose, and mouth.
- Optional caramel yarn for four embroidered button-like circles.
- 5 mm (US H/8) crochet hook as a starting point; change size to obtain gauge.
- Tapestry needle, scissors, tape measure, and locking stitch markers.
- Pins for assembly on a work surface; remove every pin before any use.
Use yarn with a care label suitable for the intended washing routine. Avoid plastic eyes, separate decorative buttons, beads, cords, and ties in this adaptation. Do not stuff the ears or muzzle.
Gauge and Measurements
Main stitch gauge after washing and drying: 14 double crochet stitches and 8 rows = 4 in / 10 cm. The metric gauge controls the calculations below; inch conversions are approximate.
Make a swatch: chain 24. Double crochet in the third chain from the hook and in each remaining chain: 22 stitches. Work 16 rows total using the turning instructions below. Wash and dry according to the yarn label, then measure a central 10 cm square. If there are too many stitches per 10 cm, try a larger hook; if too few, try a smaller hook. Check row height as well.
| Piece | Calculated size before edging at gauge |
|---|---|
| Main back | 35 × 40 cm / 13.8 × 15.7 in |
| Each side point | 20.7 cm base × 18.8 cm depth / 8.2 × 7.4 in |
| Each lower point | 17.1 cm base × 15 cm depth / 6.7 × 5.9 in |
| Hood rectangle before folding | 35 × 22.5 cm / 13.8 × 8.9 in |
| Hood after folding | 17.5 cm depth × 22.5 cm height / 6.9 × 8.9 in |
| Front panel | 35 cm top width × 40 cm total length / 13.8 × 15.7 in |
The laid-flat assembly is approximately 72.5 cm across the side tips and up to 77.5 cm from hood top to lower tips before edging. These are geometric estimates, not finished sample measurements. The hood’s size does not establish a head circumference or guarantee fit.
U.S. Crochet Terms
- ch: chain.
- sc: single crochet.
- dc: double crochet.
- sl st: slip stitch.
- st / sts: stitch / stitches.
- dc2tog: double crochet two stitches together; decreases by one stitch.
- dc3tog: double crochet three stitches together; decreases by two stitches.
- RS / WS: right side / wrong side.
Double crochet: Yarn over, insert hook into the stitch, yarn over and pull up a loop. Yarn over and pull through two loops; yarn over and pull through the remaining two loops.
dc2tog: Yarn over, insert into the next stitch, pull up a loop; yarn over and pull through two loops. Repeat that partial stitch in the following stitch. Yarn over and pull through all three loops on the hook.
dc3tog: Work the same partial double crochet in each of the next three stitches, leaving each unfinished. Yarn over and pull through all four loops on the hook.
Single crochet: Insert hook, yarn over and pull up a loop, then yarn over and pull through both loops.
Rules Used Throughout
Work through both top loops unless instructed otherwise. The ch 2 at the start of a dc row never counts as a stitch. Place the first stitch into the first actual stitch, not into the turning chain. Turn at the end of each row except the final row of a piece. Count stitches before moving on.
For a decrease row starting with N stitches: ch 2, dc2tog over the first two stitches, dc in each of the next N−4 stitches, dc2tog over the last two stitches. The new count is N−2. Where three stitches remain, use dc3tog as specified instead.
1. Main Back — Make One
Chain 51.
Row 1: Dc in the third chain from the hook and in every remaining chain. 49 dc.
Rows 2–32: Ch 2, dc in each of the 49 stitches. 49 dc in every row.
Fasten off. The piece should measure approximately 35 cm wide and 40 cm long. Lay it with Row 32 at the top; this is the hood attachment edge. Mark the middle stitch, stitch 25, on both top and bottom edges. Choose one face as RS and mark it.
2. Side Points — Make Two
Chain 31.
Row 1: Dc in the third chain from the hook and in every remaining chain. 29 dc.
Rows 2–14: Work the decrease row described above once per row.
| Row | Stitch count after completing row |
|---|---|
| 1 | 29 |
| 2 | 27 |
| 3 | 25 |
| 4 | 23 |
| 5 | 21 |
| 6 | 19 |
| 7 | 17 |
| 8 | 15 |
| 9 | 13 |
| 10 | 11 |
| 11 | 9 |
| 12 | 7 |
| 13 | 5 |
| 14 | 3 |
| 15 | 1 |
Row 15: Ch 2, dc3tog over the three remaining stitches. Fasten off, leaving a short tail to weave in. Use a separate approximately 60 cm / 24 in strand for the base seam.
Each point has a wide foundation edge and a single-stitch tip. Make a second identical point.
3. Lower Points — Make Two
Chain 26.
Row 1: Dc in the third chain from the hook and in every remaining chain. 24 dc.
Rows 2–12: Work the decrease row once per row. On Row 12, there are four old stitches: dc2tog twice, with no plain dc between.
| Row | Stitch count after completing row |
|---|---|
| 1 | 24 |
| 2 | 22 |
| 3 | 20 |
| 4 | 18 |
| 5 | 16 |
| 6 | 14 |
| 7 | 12 |
| 8 | 10 |
| 9 | 8 |
| 10 | 6 |
| 11 | 4 |
| 12 | 2 |
Fasten off. Leave the two-stitch tip slightly rounded. Make a second identical point. Set aside approximately 50 cm / 20 in of yarn for each base seam.
4. Assemble the Back and Points
Lay the back RS up with the marked top edge away from you.
Side points: On each side edge, mark the upper 17 row ends, from Row 32 down through Row 16 inclusive. This span should be about 21.25 cm long. Pin the 29-stitch foundation edge of one side point along that span, with its tip facing outward. Match the two ends and midpoint first. The difference between the estimated 20.7 cm point base and 21.25 cm edge span should ease gently; do not stretch hard.
Using a tapestry needle, make small whipstitches through the edge loops of both pieces. Spread the 29 base stitches over the marked row ends; use two base stitches at 12 row ends and one base stitch at five row ends, spacing the single placements throughout. Repeat on the other side. Keep the join flexible and check that neither seam gathers.
Lower points: Along the bottom foundation edge of the back, count 49 stitch positions. Sew the foundation edge of the first lower point to positions 1–24, one stitch to each position. Leave the center position 25 unjoined. Sew the second point to positions 26–49. Both tips point downward. This gives two lower points with a small central notch rather than closed leg pockets.
Weave seam ends securely in several directions on the WS. Lay the work flat and check that paired points match.
5. Hood — Make One Rectangle
Chain 51.
Row 1: Dc in the third chain from the hook and in every remaining chain. 49 dc.
Rows 2–18: Ch 2, dc in every stitch. 49 dc per row. Fasten off.
Lay the rectangle with its foundation edge at the bottom and Row 18 at the top. Fold it left to right with RS together so the two short row-end edges meet. The fold becomes the center back of the hood. The two loose row-end edges become the face opening.
Sew the two halves of Row 18 together from the fold to the meeting corners, aligning the stitches. At the center stitch, fold without adding a bulky knot. Turn RS out. The joined edge is the top seam, and the foundation edge remains open as the neckline.
Attach the hood: Match the midpoint of its 49-position foundation edge to stitch 25 of the back’s top edge. Match both outer ends to the back’s outer top corners. Sew across one position to one stitch, 49 to 49, keeping the hood RS facing the same way as the back RS. Its open face points toward the front of the wrap. Do not sew the face opening shut.
6. Bear Ears — Make Two
Use the brown yarn and the same hook; work in joined rounds. The starting ch 1 never counts as a stitch.
Round 1: Ch 2; work 6 sc into the second chain from the hook. Join with a sl st to the first sc. 6 sc.
Round 2: Ch 1, work 2 sc into every stitch. Join. 12 sc.
Round 3: Ch 1, repeat (sc in next stitch, 2 sc in next stitch) six times. Join. 18 sc.
Round 4: Ch 1, repeat (sc in next two stitches, 2 sc in next stitch) six times. Join. 24 sc.
Round 5: Ch 1, sc in every stitch. Join. 24 sc. Fasten off with an approximately 40 cm / 16 in sewing tail. Repeat for the other ear.
The sc gauge differs from the main dc gauge; measure these rather than calculating their diameter from the dc swatch. Aim for roughly 5–6 cm / 2–2.4 in across. If substantially different, make both ears again with a hook that produces the desired size.
Keep each ear single-layered and unstuffed. Flatten the lower quarter of the circle into a short base. Pin the ears symmetrically near the hood top, with each ear base approximately 4–5 cm / 1.6–2 in from the top seam, one on each side. Sew through the entire flattened base twice, securing both ends firmly. Check symmetry before removing all pins.
7. Bear-Face Front Panel — Make One
This panel has a straight upper section and a tapered lower section. Its shaping differs from the rounded, radiating stitch arrangement in the reference image.
Chain 51.
Row 1: Dc in the third chain from the hook and in every remaining chain. 49 dc.
Rows 2–8: Ch 2, dc in every stitch. 49 dc. The straight section is approximately 10 cm high.
Rows 9–31: Work one decrease row per row.
| Row | Count | Row | Count |
|---|---|---|---|
| 9 | 47 | 21 | 23 |
| 10 | 45 | 22 | 21 |
| 11 | 43 | 23 | 19 |
| 12 | 41 | 24 | 17 |
| 13 | 39 | 25 | 15 |
| 14 | 37 | 26 | 13 |
| 15 | 35 | 27 | 11 |
| 16 | 33 | 28 | 9 |
| 17 | 31 | 29 | 7 |
| 18 | 29 | 30 | 5 |
| 19 | 27 | 31 | 3 |
| 20 | 25 | 32 | 1 |
Row 32: Ch 2, dc3tog over the last three stitches. Fasten off.
The resulting panel is about 35 cm wide at the top and 40 cm long. Do not add extra rows to mimic the photo; that changes the overlap and attachment positions.
8. Embroider the Face
Work before attaching the front panel so you can reach its reverse side. Place the panel RS up, with its wide foundation edge at the top. Use removable markers to mark a vertical centerline.
- Place the center of the nose approximately 17 cm / 6.7 in below the top edge.
- Place the eyes about 14 cm / 5.5 in below the top, one 3 cm / 1.2 in to each side of the centerline.
- Mark a small downward-pointing triangular nose approximately 2 cm wide and 1.5 cm high.
- Mark a short line extending 2 cm below the nose and a shallow smile approximately 4 cm wide.
Embroider each eye as a small filled oval, about 0.8–1 cm across, using short satin stitches. Outline and fill the nose with short stitches. Work the center line and smile in backstitch. Anchor into yarn strands where necessary so the embroidery does not disappear through the spaces between dc stitches.
Keep the reverse free of long loose strands. Secure each section and weave its ends separately. Do not add plastic eyes, a separate nose, or stuffing.
Optional button-like decoration: Use caramel yarn to backstitch four small circles directly onto the front panel: two about 3 cm below its top edge and two about 9 cm below it, each about 3 cm in from the side. Fill lightly if desired. These are embroidered motifs only, not functional closures.
9. Edge the Pieces
Edge the front panel before attaching it. Join brown yarn at an upper corner. Ch 1 and work sc around the perimeter, using these starting rates:
- Along foundation or regular stitch edges: one sc per stitch position.
- Along row ends: approximately two sc per dc row end.
- At the two upper corners: three sc in the corner position.
- At the lower tip: three sc into the tip stitch.
Join with a sl st and fasten off. Edging tension varies: lay the panel flat every few inches. If the edge ruffles, remove that section and use fewer stitches; if it pulls inward, use more. There is no fixed edging total because row-end pickup is adjusted to the actual fabric.
Edge the outer perimeter of the assembled back, points, and hood opening in the same way. Follow the exposed outside outline, not the internal seams. At each outward point use three sc; at an inward notch work one sc at its deepest accessible position and avoid crowding it. Do not crochet across a gap in a way that forms a closed armhole or leg pocket. Secure all ends.
10. Attach the Overlapping Front
Lay the back RS up with the hood at the top. Position the front panel RS up, with its straight top edge 5 cm / 2 in below the hood-to-back seam and its centerline aligned with the center of the back. Its lower tip will extend approximately 5 cm below the rectangular back and overlap the area between the lower points.
Pin only the front panel’s left straight side, corresponding to its first eight rows. This 10 cm edge lies along the left edge of the back, starting 5 cm below the top. Sew those two edges together with small, flexible whipstitches, catching the back as well as the front. Reinforce the top and bottom of this short attachment without making bulky knots.
Leave the top, right edge, and tapered lower edges open. The front is a loose decorative flap; it is not a secured wearable closure. Do not add ties, fastening loops, or tight closures to compensate for movement. Fold the flap leftward to open it fully, then return it to the center for display. Check this action with a doll first.
Troubleshooting
A point leans to one side: Verify that every decrease row starts and ends with a decrease. The turning chain is not a stitch.
The back gets wider: Check for accidental stitches in the turning chain. Every back row must contain 49 dc.
A side seam ripples: Undo it and redistribute the foundation stitches across the 17 marked row ends. Match endpoints and midpoint before sewing again.
The front panel is too narrow: Confirm 49 stitches in Rows 1–8 and a reduction of exactly two stitches per shaping row. Do not begin decreasing before Row 9.
The hood is too small, droops, or approaches the face: Do not stretch it onto a baby or tighten the opening. Rework the sizing after checking a physical sample; the age label is not a substitute for fit.
Finishing and Testing Before Publication
Wash and dry as directed on the yarn label. Reshape gently without aggressively stretching. Check that embroidery and seams remain secure after washing. Remove all pins, markers, loose fibers, and yarn scraps.
Record the actual yarn used, washed measurements, ear diameter, and any revised row counts. Check the opening and overlap on a doll before considering a supervised fitting. A competent crocheter should make a complete sample and verify the construction before this draft is advertised as a tested pattern.
Keep this draft status visible when sharing the instructions. A stitch-count check alone cannot verify drape, fit, comfort, durability, or infant suitability.



