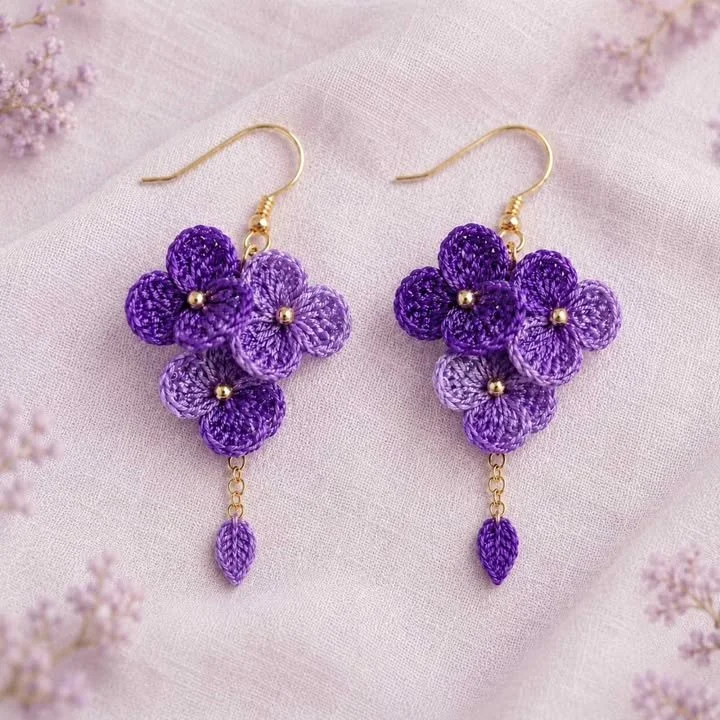
Creating these delightful crocheted earrings is a charming way to express creativity while producing a unique accessory that can brighten any outfit. These tiny, statement earrings are not only visually appealing with their intricate designs but also lightweight, making them perfect for everyday wear or special occasions. The crochet technique used in this pattern allows for a detailed texture that adds dimension and character to each piece.
In this article, we’ll guide you through the steps needed to create your own pair of beautiful crochet earrings. We’ll also cover the materials required, how to adjust your project for size, and helpful tips to ensure your crochet experience is enjoyable and successful.
Pattern at a Glance
- Skill Level: Intermediate
- Terminology: US crochet terms
- Construction: Worked in rounds
- Finished Size: Approximately 2” in diameter
- Yarn Weight: Light (DK)
- Hook: 3.75mm (F)
- Main Stitch: Double crochet
- Gauge: Not critical but recommended to match the style.
- Motifs: Single motif for each earring
- Joining: Not applicable; motifs are worked in one piece
- Border: None required
- Seaming: None required
Materials
For this project, gather the following materials:
- Yarn: Light DK weight yarn in your choice of color (approx. 50 yards)
- Hook: 3.75mm (F) crochet hook
- Notions:
- Scissors for cutting yarn
- Yarn needle for weaving in ends
- Stitch markers for keeping track of rounds (optional)
Choose natural fibers such as cotton or cotton blends for a softer finish or acrylic for brighter colors and durability.
Yarn and Color Notes
When selecting yarn for your earrings, consider the characteristics each fiber type offers. Cotton yarn is breathable and has a nice drape, which helps maintain the shape of your earrings, while acrylic can come in vivid colors and is often more budget-friendly.
Feel free to play with color combinations to match your personal style or the clothes you wear most. Solid colors are classic, but variegated or gradient yarns can give a unique flair to your pieces.
Finished Measurements
The earrings will measure approximately 2 inches in diameter. This size is ideal for making a bold statement without being too heavy or cumbersome.
Gauge
Gauge is not critical for this project due to its decorative nature. However, if you’re concerned about the size of your finished product, it’s best to work a small swatch to test your tension.
To check your gauge:
- Work a small square of double crochet measuring 4 inches.
- Count the number of stitches across to ensure you are within a comfortable range that achieves your desired size.
If your stitches are too loose, consider using a smaller hook, or if they’re too tight, switch to a larger hook.
Abbreviations
Here are the abbreviations you’ll come across in this pattern:
- ch: chain
- dc: double crochet
- st: stitch
- sl st: slip stitch
- rnd: round
Important Pattern Notes
- Chains at the beginning of a row do not count as stitches unless stated.
- Always join with a slip stitch to the top of the first stitch of the round when instructed.
- Keep your tension consistent throughout to ensure your earrings match in size.
- Mark the beginning of each round if necessary.
Special Stitches and Techniques
This pattern primarily uses the double crochet (dc) stitch, which is standard in crochet for creating height and texture. If you’re unfamiliar with it, it is worked as follows:
- Yarn over and insert the hook into the stitch.
- Yarn over again and pull through.
- Yarn over, pull through the first two loops on the hook.
- Yarn over, pull through the last two loops on the hook.
Understanding the Construction
The earring is designed as a single motif that is worked in rounds, with each round building upon the previous one to create the earring’s shape and texture. The final step involves attaching an earring hook to your finished piece, allowing you to wear your creation with ease.
Full Pattern Instructions
Foundation
Start with a magic ring.
Round 1
- Ch 1 to begin.
- Work 10 dc into the magic ring.
- Pull the tail to close the ring and join with a sl st to the top of the first dc (you will have 10 dc).
Round 2
- Ch 3 (counts as the first dc), then work 1 dc in the same stitch.
- In the same manner, work 2 dc in each stitch around.
- Join with a sl st to the top of the first dc (you will have 20 dc).
Round 3
- Ch 3, then work 1 dc in the next stitch.
- *Increase in the next stitch (2 dc in one stitch); repeat from * to around and join (you will have 30 dc).
Round 4
- Ch 3, then 1 dc in the first stitch, 1 dc in next, increase in the next.
- Repeat from * to around and join with sl st (you will have 40 dc).
Finishing
Weave in all ends using a yarn needle.
Checkpoints
- After Round 1, ensure your circle is closed and the stitches are evenly distributed.
- At the end of each round, verify your stitch count matches the expected total.
Assembly
Your earrings are ready to wear once you’ve finished all rounds and woven in the ends. No additional assembly is required.
Finishing
If desired, gently block your earrings by steaming with an iron to shape them perfectly.
How to Resize
While the pattern is designed for a specific size, you can adjust the size by adding or omitting rounds. For larger earrings, simply add more rounds where indicated or increase your stitch counts by modifying the number of increasing stitches in each round.
Useful Variations
- Try using contrasting colors for each round to create a striped effect.
- Create oversized versions for a bolder statement by increasing the number of repeats in each round.
- Experiment with the addition of beads or embellishments between stitches for added sparkle.
Troubleshooting
Why Is My Project Getting Wider?
Check if you’re accidentally adding extra stitches in your round or if your tension is too loose.
Why Is My Edge Wavy?
Ensure you’re not skipping stitches or working into the wrong spots. Blocking can help smooth out the edges.
Why Is My Fabric Curling?
This can happen if you work too tightly or if your yarn has a lot of memory. Try loosening your tension or using a different yarn.
Frequently Asked Questions
Can I use a different yarn weight?
Yes, but be aware the finished size and look may change dramatically, so the adjustment of hooks may be necessary.
Can I make it larger?
You can certainly increase the stitch counts during the rounds or add additional rounds to enlarge the earrings.
Can I use cotton?
Absolutely, cotton yarn is a great choice as it holds the shape well and allows for beautiful stitch definition.
Do I need a special hook?
For this lightweight project, a standard 3.75mm (F) hook is sufficient.
Is the pattern reversible?
While it can be worn both ways, the back side may not have the same polished look as the front.
How should I block it?
Gently steam block your finished earrings to set the shape without distorting the stitches.
Final Thoughts
This project is an enjoyable way to explore crochet while creating a fashionable accessory. The construction of these earrings involves simple rounds of double crochet, making it suitable for various skill levels. Follow these detailed instructions, and soon you’ll have a lovely pair of earrings that showcase your personal flair. Happy crocheting!



