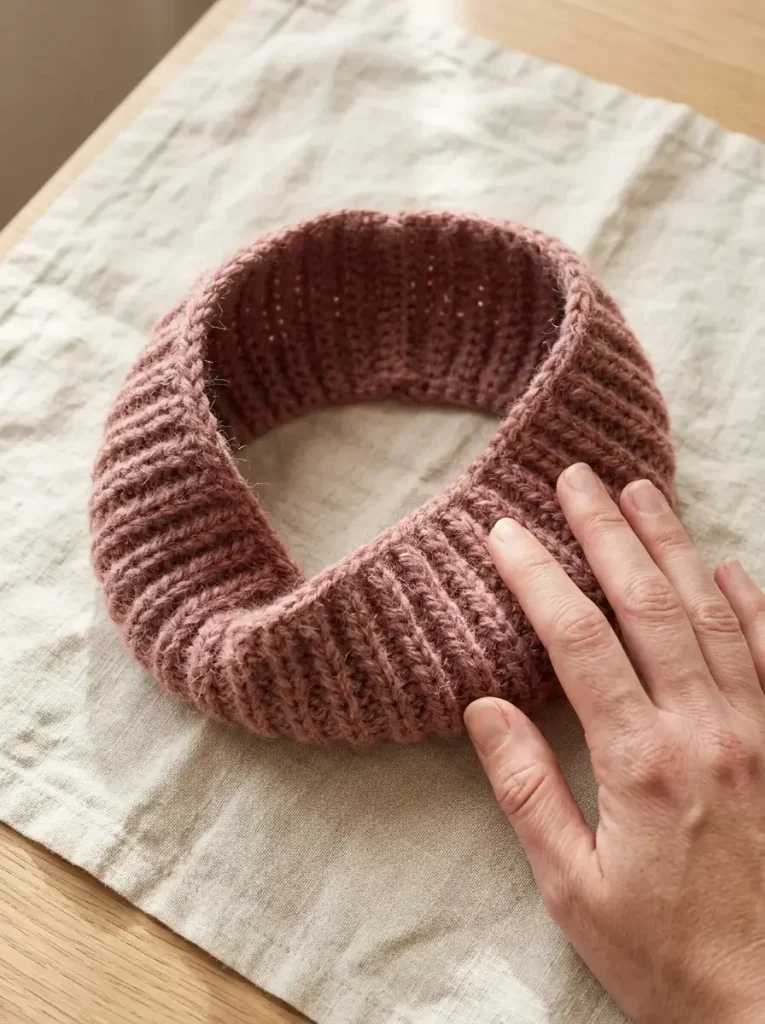
This beautifully simple ribbed ear warmer is a fantastic project for anyone looking to add a cozy accessory to their winter wardrobe. It combines an easy-to-follow construction with a stunning texture, making it visually appealing and functional. The design allows for a customized fit, ensuring that it hugs your head comfortably without being overly tight. With just a few basic crochet techniques, you can whip up this lovely ear warmer in no time, perfect for chilly days out or simply keeping warm at home.
The construction is straightforward, primarily involving a series of back loop only stitches to create a classic ribbed effect. This technique not only adds depth to the fabric but also enhances its stretch and recovery, ensuring it fits snugly around your ears. Moreover, the soft worsted wool/acrylic blend in dusty rose gives the ear warmer a gentle and warm feel against your skin.
Whether you’re making it for yourself or as a thoughtful gift, this ear warmer is versatile and stylish. Let’s dive into the details to get you started on this chic project!
Pattern at a Glance
- Skill level: Easy
- Terminology: US crochet terms
- Construction: Worked in rows, seamed to form a ring
- Finished size: Approximately 4 in / 10 cm wide; made to measure
- Yarn weight: Worsted
- Hook: 5 mm
- Main stitch: Single crochet (sc), back loop only (BLO)
- Gauge: 16 sc per 4 in / 10 cm
Materials
To create your cozy ribbed ear warmer, you’ll need the following materials:
- Yarn: 60–80 g soft worsted wool/acrylic blend in dusty rose
- Hook: 5 mm crochet hook
- Notions:
- Yarn needle (for weaving in ends)
- Scissors
- Measuring tape (to ensure proper fit)
This combination of materials creates a comfortable and warm finished product, perfect for braving the cold!
Yarn and Color Notes
Choosing the right yarn for your ear warmer is crucial. A soft worsted wool/acrylic blend is an excellent choice because it provides warmth while remaining light and breathable. The dusty rose color adds a chic touch that complements a variety of outfits.
If you’re considering color variations, try combining the dusty rose with complementary shades such as cream, lavender, or soft grey for a two-tone effect. The ribbed texture will showcase the color contrast beautifully.
Finished Measurements
The targeted width of the ear warmer is approximately 4 in / 10 cm. However, since it’s made to measure, you will customize the length according to your head circumference.
Gauge
The suggested gauge for this project is 16 single crochets (sc) per 4 in / 10 cm. Measuring gauge is important to ensure a proper fit, especially for accessories like this. If your gauge is larger, your ear warmer will be wider; if it’s smaller, it may be too snug. Always check your gauge with a washed swatch to see how the yarn reacts after washing.
Abbreviations
- ch: chain
- sc: single crochet
- BLO: back loop only
- st: stitch
Important Pattern Notes
- Turning chains do not count as stitches.
- Make sure to check your fit as you go, especially with the length, to ensure comfort.
- The seam will be on the inside when worn, so focus on keeping it neat but flexible.
Special Stitches and Techniques
Back Loop Only (BLO)
Working in the back loop only helps create the ribbed texture. This technique involves inserting your hook into the back loop of each stitch rather than through both loops, providing a distinct ridge effect.
Understanding the Construction
This ear warmer is constructed by starting with a chain, then working single crochet stitches in the back loops only to build a long band. After achieving the desired length, the two ends are seamed together to form a comfortable ring.
Full Pattern Instructions
Foundation
- Measure around your head where the band will sit and determine a relaxed band length about 1–2 in / 2.5–5 cm shorter than this measurement for a comfy fit.
Starting Chain
- Ch 17.
Row 1
- Row 1: Sc in the second chain from the hook and each remaining chain (total 16 sc). Adjust the starting chain count if you need a different band width.
Row 2
- Row 2: Ch 1, turn, sc BLO in each of the 16 stitches. Repeat Row 2 until the piece reaches the intended length.
Ending Construction
- Stop at the desired length. For a 22 in / 56 cm head, begin checking for comfort at 20–21 in / 51–53 cm. Bring the short ends together to try the band on without pulling too tightly. Make adjustments by adding or removing rows until it feels snug yet comfortable. Note: Using cotton or low-stretch yarn may require a different length.
Finishing the Band
- Leave a 16 in / 40 cm tail and fasten off. Fold the band so that the foundation edge meets the final row without twisting. Whipstitch corresponding stitches through both edges, ensuring the seam remains flexible.
Weaving in Ends
- Weave in ends in two directions. Turn the seam inward and position it at the back when worn. Wash according to the yarn label and lay flat to dry without stretching. The completed look is a simple dusty-rose ribbed band without buttons or embellishments.
Checkpoints
- Your piece should measure approximately 4 in wide at all points.
- Confirm that there is no twisting when you sew the ends together.
- Ensure the ear warmer fits snugly over your ears without being uncomfortable.
Assembly
With this project, assembly is quite straightforward. You will bring the two ends of your crocheted piece together and whipstitch them, creating a seamless finish that provides a clean look.
Finishing
After seaming, it’s essential to weave in any loose ends. This not only tidies the piece but also prevents unraveling. Blocking is not necessary for this project, but if you wish to shape it more evenly, you can steam block with a fabric steamer.
Resizing
To resize the ear warmer, simply adjust the starting chain. For a larger head circumference, increase your starting chain in increments that maintain the foundation of 16 stitches. Ensure to maintain gauge for a proper fit.
Useful Variations
- Create a color-blocked version using multiple colors.
- Use a variegated yarn to add visual interest.
- Alter the length of the band for a wider look or cover more of your ears.
Troubleshooting
Why Is My Project Stretchy or Loose?
Check your gauge. Using a hook that is too large for your yarn can cause looseness. Recalculate your gauge before trying again.
What if My Ear Warmer Is Too Tight?
You may have not done enough rows. To adjust, you can either add more rows or increase the number of starting chains before you begin.
Frequently Asked Questions
Can I use a different yarn weight?
Yes, but be sure to adjust your hook size accordingly and check your gauge.
Can a beginner make this?
Absolutely! It’s an easy project perfect for practicing basic crochet skills.
Do I need a special hook?
A standard 5 mm crochet hook is suitable for this project.
Final Thoughts
Creating this ribbed ear warmer requires just a few basic crochet techniques and allows for customization to fit your personal style and size. With its straightforward construction and charming texture, you’ll find it to be a rewarding project that enhances your winter wardrobe. Enjoy crocheting and wearing this cozy accessory!



